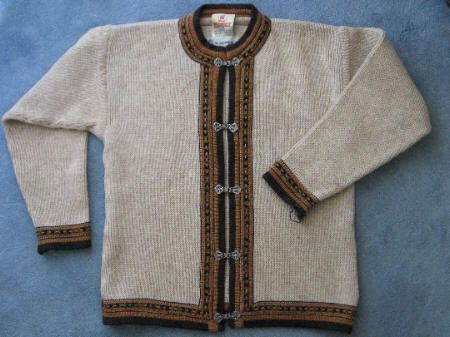
• My father-in-law is a wonderful person, and I don’t mind the whole world knowing that I think so.  When my mother-in-law asked me if I could mend his favorite cardigan as a surprise birthday present, I jumped at the chance.  He bought this sweater some thirty-five years ago on a trip to his ancestral home in Scandinavia.  Unfortunately for the sweater, he loved and wore it so much that the cuffs gave out, causing it to be packed away in the closet for years.
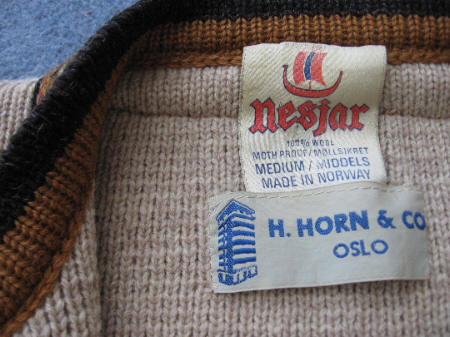
    Nesjar

    Cardigan

    Frayedcuff

    Holes

    I also found a number of moth holes, so this turned out to be quite instructive for me, as well.  I’ve always shuddered when faced with the possibility of something needing mending, but I will say now, it isn’t as bad as you might think.

    I took the sweater to my favorite yarn shop, and asked one of the owners for some advice on wools.  "Oh, well," he said dubiously, shaking his head, "you’ll just have to look through the store, until you find something that matches," and he handed me a skein of black Sandesgarn Smart superwash, and left me to it.  I looked through the whole place after that, but it turned out that the Smart was indeed the best choice.  The sandy-brown of the body has a hint of slightly darker sand in it, but the rich coffee-brown wool at the edges has an almost silvery hair running through the brown that gives it a lovely depth, and the skein of Smart has this same hint in it.

    The shop owner also suggested tapestry wool, which as soon as he did stirred something in my memory to the same effect.  There is not only a very wide variety of colors available, but you also don’t have to buy very much at a time, either.  I ended up getting a pretty close match for the main color with a dollar’s worth of tapestry wool,
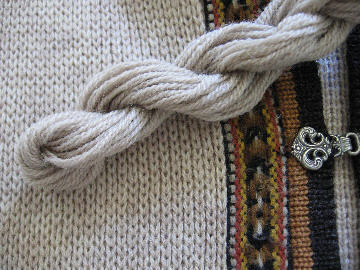
    Wool

    and took the black Smart for the cuffs.  I didn’t notice until afterwards that there was also a small hole in the burnt orange inside the neck hem, so I had to go back for another bit of tapestry wool — "oh, no," I said aloud, to no one in particular, "I have to go back to the yarn shop."

    Many moth holes are, of course, obvious, but I found a number of not-quite-holes by holding up the sweater to the sunlight, which showed them quite clearly.  I didn’t see the third one here until I did this —

    Findingholes

    There is surprisingly little in knitting reference books about mending.  Luckily for this particular repair, which usually involved only one stitch per hole, duplicate stitch (also called Swiss darning) is an excellent solution.  Most reference books have full diagrams and instructions on this for stockinette, and Theresa Stenersen’s article is very helpful as well.

    The brioche stitch of this cardigan involves a more complicated maneuver with the needle than plain stockinette, and for the first five or six holes, I had to turn the piece for each stitch, working first the front loop, then the back loop separately.  (I dreaded the sleeves, which this way would have meant doing the front loop, turning the sleeve inside-out, doing the back loop, turning the sleeve right-side-out, doing the front loop….)  But after a while, something clicked in my mind, and the maneuver became much less complicated.  Stick with it — it gets easier with practice.  Don’t be tempted to skimp on the anchoring stitches on either side of the hole, as an inch to an inch-and-a-half of anchoring stitches will not only keep the loose ends from ravelling, but it will also give you a bit of practice, a running start if you will.

    Since I am right-handed, I found it easier to work from right to left at first.  Bring the needle up through the bottom of the first stitch (the V-shape), and around the first loop at the top,

    1

    then down back through the bottom of the first stitch and without going all of the way through the fabric aim the tip of the needle out toward the left.  Push the fabric out a little from the back, if you can, so that it is easier to see the direction of the original wool.  It’s a bit like following someone through a tight maze; just stick close.  The brioche doesn’t go straight across to the next V from here as the stockinette would, but up again and slightly to the right, almost underneath the first stitch, then across in a purl bump,
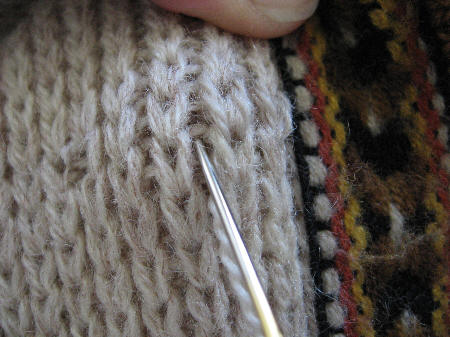
    2

    then down again slightly to the left, and under the lower purl bump, to come out at the bottom of the next V.
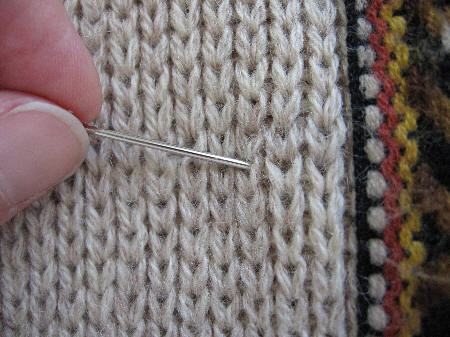
    4

    Or, work the first knit stitch from the front — up from the bottom of the V, around at the top, and down again at the bottom of the same V, and do go straight through to the back.  Turn the work over, and work another knit stitch where the wool is placed — this V will be smaller than the front V —
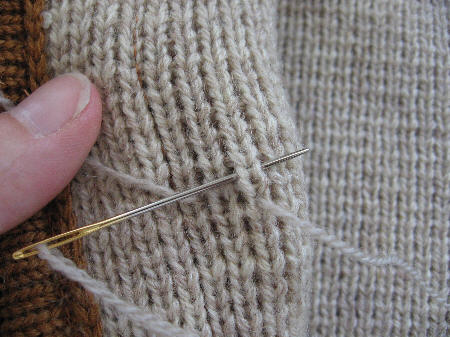
    3

    and straight back through at the point of that V, to the front.  I’m fairly sure that this doesn’t quite capture the form of the brioche, but it is nearly invisible, and that is, after all, what counts in mending.

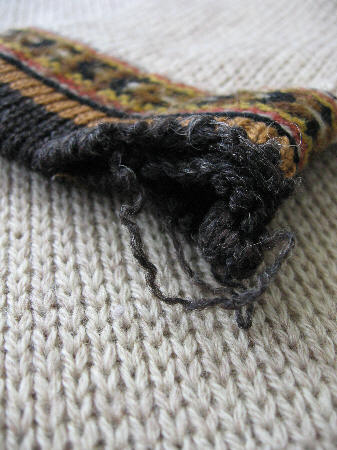
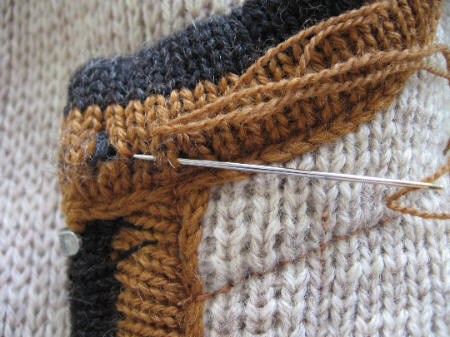
    One of the cuffs was frayed completely, which involved picking up the loose stitches — which thanks to the lovely hairy wool had dropped only one row — replacing the dropped row, and grafting the two sides back together.  (The lump in the middle is the seam of the sleeve, which was worked flat and sewn together.  Being at the underside of the wrist, it was the first thing to go.)  The Smart is a 4-ply, and so I pulled out one of the plies to make it a more similar weight to the original wool, but I didn’t want to do more than that and compromise the strength of the wool.
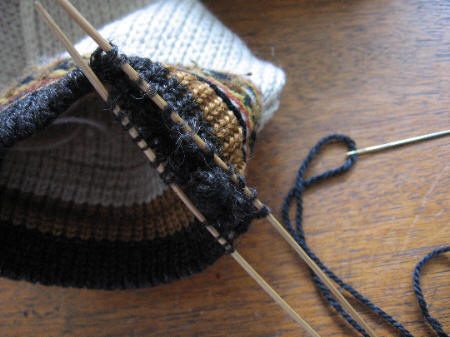
    Cuffonneedles

    In a way, it was nice that there was actually an open section, as I could put my finger inside the hem and see clearly where to put the darning needle.
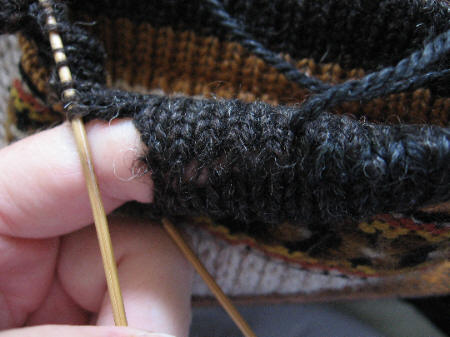
    Graftingcuff

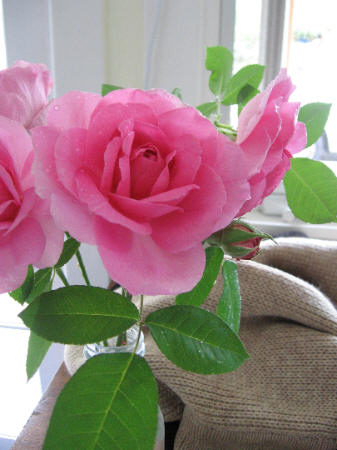
    I stopped for a moment, literally to smell the roses, as the "Gertrude Jekyll" bush just outside the sunroom window is covered with gorgeous blooms, and so I brought some inside to enjoy close-up.  Thorny things, but a heavenly scent, not to mention the color.
    Gertrudejekyllrose

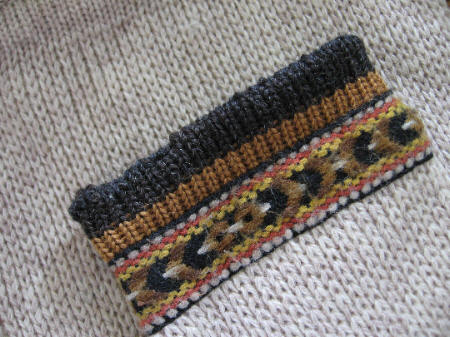
    The section of cuff that was the most frayed looked a bit wonky when I was finished, but on the whole it went back together pretty well, I thought.  The whole fold line was looking a bit thin, so I darned that row all of the way around.
    Mendedcuff

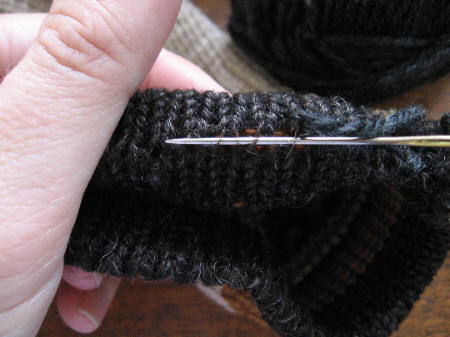
    The other cuff was just held together —
    Worncuff

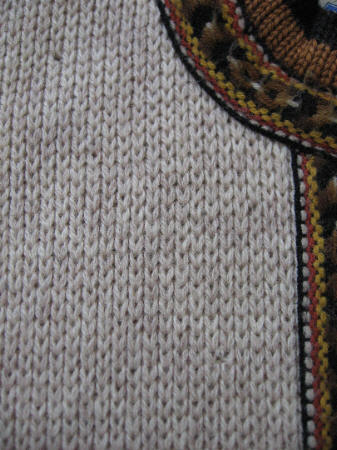
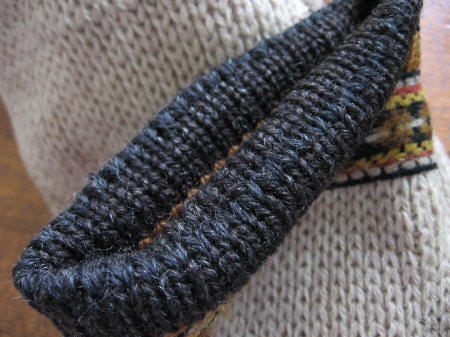
    but with a good strong light and a large, flat surface to work on, the duplicate stitch went very smoothly.  The black is rather obvious against the coffee-brown original, but this is less apparent when folded in its usual position.  I still like the depth that the little silvery fibers give the wool, both the original and the Smart, and I think that a flat brown mend would have actually stood out a bit more against the original.
    Mendedcuff2

    Pewterclasp

    The hole on the inside of the collar was a cakewalk after the brioche and the cuffs,
    Collarhole

    duplicate stitch up to and around the hole, pulling the ends inside the turned-over hem.
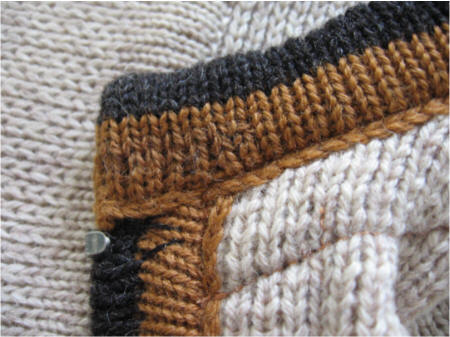
    Mendedcollar

    Tapestry wool does have a different texture than this wool, but after washing and a few judicious tugs, this will settle in.  I don’t usually iron knitted things, but early on I decided that this one actually requires a good pressing, since the uniformity and flatness of the machine-knitting make the hand-mending stand out a bit.
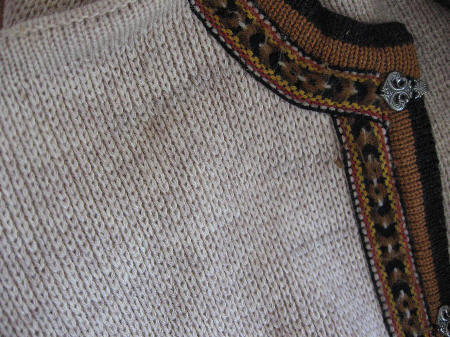
    Mendedholesoutside

    Twenty holes in the body and sleeves, one inside the collar, and two frayed cuffs repaired!

    I had not actually seen this article on repairing knits when I started, but it’s worth keeping on hand —
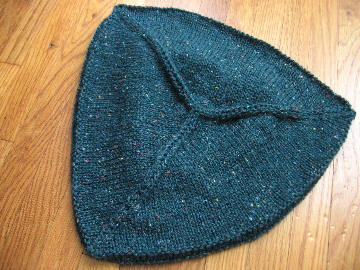
  • Well, this is a fast project — I was finished with it before the ink was even dry on the last post!

    Hat3

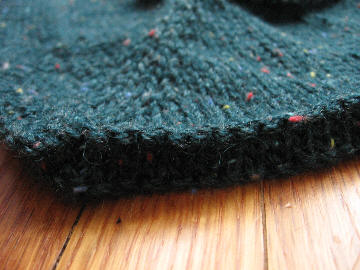
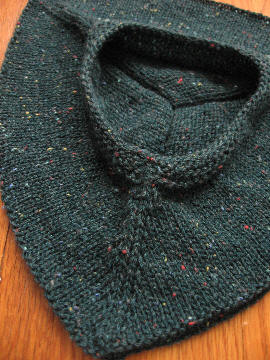
    Interestingly, it took more wool to do the bottom half than it did on the top, despite the rather large opening for one’s head.  I added the second ball in the middle of the turning, and had a fair bit left over.  It was also curious how the spacing of the decreases affected their shape — on every other row, the SSK and K2tog pairing lies smoothly, but working them every row (about halfway along the top) makes them stand up a bit, even tending to fold away from each other.

    I did make a rather embarrassing gaffe at first, reading "Gauge: 5 1/2" and realizing after a few inches that the hat coming off the needles would barely have fit a baby doll — the gauge is "5 1/2 sts to 2 in.," which I can only murmur weakly is an unusual way of writing it.  I did have to adjust the pattern then to fit the gauge of the Cleckheaton, which was in fact 5 1/2 sts per inch, so I merely doubled the cast-on.  The "pithy directions" are especially pithy here, and I found the longer explanation in the text of the chapter much easier to follow, especially as Elizabeth gives measurements here instead of row counts, and I could use those for my readjustments.

    Hat1

    Hat2

    I was happy to take Elizabeth’s advice — "Do not feel that you are in any way obliged to possess perfect sets of four needles.  Emergency and experiment have taught me that a very motley quartet will finish off a hat quite adequately"! — since I have at the moment only a US6 small circular and 3.75mm (US5) double-pointeds.  I used the circulars for the majority of the hat, and finished it off with the smaller dpns when it got towards the end.

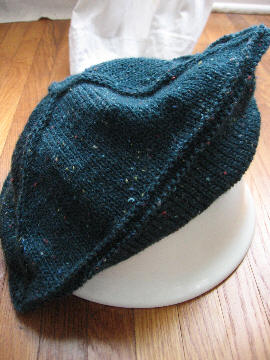
    It has a rather beret-like languor — which would be lessened with a firmer gauge, of course — and the corners make it not a little jaunty.

    Hat5

    "Wear it down or up, with the point to the front or the back, or with all points tucked in — it has as many lives as a cat"!

  • Ez_june

    This month in the Knitter’s Almanac, Elizabeth talks about hats and borders.  "I will come out flat-footed and personally disapprove of crocheted borders on knitted cardigans, but without in anyway trying to convert those who crochet borders expertly and with pleasure.  May their paths run smooth."  Ahem!  Garter stitch — it should come as no surprise to anyone who has read even a few chapters of any of her books — is her favorite, worked sideways or straight, to create a simple, flat border for sweaters and cardigans, shawls and blankets.

    (She does say, touching on the subject of borders at the neck of a cardigan, "Don’t forget to increase at the front neck-corners, and to decrease at the inside corners of a square neck," which I fear that she neglected to point out in the January chapter, regarding the Aran.)

    Like Elizabeth, I’m not much of a fan of grosgrain borders, either, which always seems to end up slightly smaller than the knitted part, however sturdy it makes the buttonband.

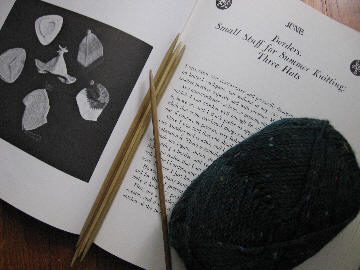
    As for hats this month, she says, "A good summer project is a bevy of hats.  They don’t take much wool, and are an excellent means of using up leftovers and oddments in the form of stripes or color-patterns."  I do have about four balls’ worth of the teal-green Cleckheaton left from last month’s mittens, and so I will use that.

    The mitered or "ganomy" hat — gnome, to us, with that pronunciation like "gaze-bo" or "sword" with the "w" firmly pronounced, which has stuck with us since childhood — looks very practical indeed, with the miters coming down over one’s ears most warmingly, and the Maltese Fisherman’s Hat even more so (with its "ridiculous tassel of a couple of dozen ends … make still more antic by cutting them at different lengths and putting a knot at the end of each"!) — but since I am going to make a set with the mittens from last month, which look rather less casual than the Ganomy, I will do the Three-Cornered Hat for this month’s Almanac project.

  • Constable_cloudstudy_1822_cortauldinst

    John Constable, "Cloud Study" (1822), Cortauld Institute of Art Galleries, London.  My first introduction to Constable was, I confess, through a Monty Python sketch in which one of the key phrases was — I think in one of Graham Chapman’s pepperpot voices — "Oh, look, it’s the man from ‘The Haywain’!"  Python notwithstanding, I’ve grown quite fond of Constable, and this cloud study is perfectly lovely.

    Canalett0_grandcanalfromsmariadellacarit 

    Canaletto, "The Grand Canal, Venice, from Santa Maria della Carità to the Bacino di San Marco" (1730-33), The Royal Collection, Windsor.  I think that I get almost as much fun from just saying the title of this painting as I do imagining myself in it.

    Carllarsson_insundbornchurch

    Carl Larsson, "In Sundborn Church" (1905).  This is rather unexpected from the stereotypical Larsson watercolors of jolly young children outdoors — subdued, moody, with the architecture taking the focus and the people half-hidden and obscured, with the tight, almost claustrophobic perspective and the infinitely beautiful blues.  I like the rather finished look of Karin in the sunlight and the less-polished brushwork of the townspeople in the shadows inside.

    Mauricequentindelatour_selfportrait_1764

    Maurice Quentin de la Tour, "Self-Portrait" (1764), Norton Simon Museum, Pasadena, California.  Another of my favorites at the Norton Simon (apparently another version is in Amiens), this self-portrait is remarkable not only for the brilliance of its colors and detail and its charm, but also for the fact that it is quite small, just 18 x 15 in. (45 x 38 cm).  He looks very French, does he not?  I find it very poignant, too, that on first appearance, even second, this portrait delights with the casual turn of his head and the pleasant smile, and yet his eyes are rather sad.  One hesitates to read too much from an artist’s life into his works, but de la Tour suffered from mental illness in the second half of his long life, and it seems to me that he senses it already.

    Boticelli_madonnaandchildwithadoringange

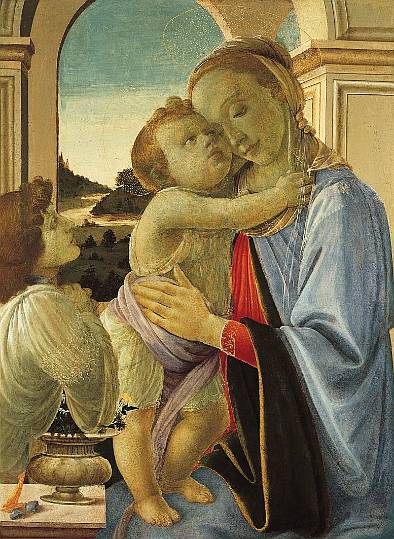
    Botticelli, "Madonna and Child with Adoring Angel" (ca. 1468), Norton Simon Museum, Pasadena, California.  A gem among gems at the Norton Simon.  The rather shimmery lines in this image are actually golden in the original, which has a luminous, ethereal beauty surrounding its impeccable draftsmanship.

  • Beth writes, "I’ve started on the back, seems to be going smoothly so far – I just find Kate’s design with that back pleat to be ingenious.  However, I think I need to make mine a little longer than the pattern calls for – and feel rather intimidated to figure out how without goofing up that pretty pleat as well as matching up the front pieces!"

    I think that lengthening the body would involve a bit more than just working it longer than instructed, because of the back pleat.  I’ve never modified such a tailored garment before, so if anyone has some advice, please shout out!

    My guess would be that in order to keep the armhole shaping intact, the length needs to be added to the body pieces below the point where the armhole shaping begins.  On the front pieces, this isn’t much of a problem, as you can either add some rows in at the "continue even in patt until piece measures ___" part, or add two rows in between the decreases (as I did for the sleeves), to keep the line of the side seam straight.

    For the back, you might be able to add a bit of length by widening the yoke piece, and then repositioning the armhole shaping on the back, but you either have to know ahead of time that you will adjust the length, or be prepared to reknit the yoke.  This would be considerably fiddly, as well as setting the top of the pleat further down on your back, rather awkwardly.  The diamond section on the pleat is the same on all sizes (112 rows), and so obviously the least-complicated way is how Kate set the stitch count for the differing sizes, by adding stitches to the plain sections on either side of the pleat, and then at the "cont without further side decs" section (just before the armhole shaping begins), do decrease until the correct number of stitches for your size is reached.  The pattern doesn’t give you much space to perform this trick, but I think it could be done, as long as you don’t want a lot of extra length!  It might be simpler to put the side decrease rows closer together, spacing them out evenly through the stockinette section.

    Whew!

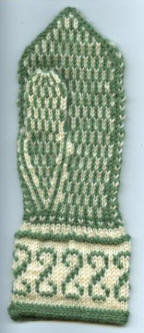
  • Mary Tess sent me some photos of her very handsome Norwegian Mitten, the other mitten pattern in the May chapter of Knitter’s Almanac, which she finished at about the same time I did my mitered mittens.  Elizabeth would be proud, don’t you think?!

    Marytess_2_1 Marytess_palm_2

    Mary Tess writes,
    "Specs: Norwegian Mittens from Elizabeth Zimmermann’s Knitter’s Almanac
    Yarn: Dalegarn Falk 100% superwash wool 50 g. 116 yds/106 m. 
    Colors: grass green (a much brighter green than appears on the monitor) and cream
    Needles: Rosewood 2.5 mm (U.S. 1 1/2) dpns
    Gauge: 15 1/2 stitches & 15 rows per 2 inches in stranded pattern
    Completed size: 10 1/8 inches long, 7 inches around hand
    Completed width at cuff: 4 inches
    One mitten used less than 50 g. of yarn
    This size would fit a child."
  • Booking Through Thursday is basing this week’s questions on a list of previous years’ bestsellers.

    In 1956, these were the top ten fiction bestsellers for the year:

  • Don’t Go Near the Water, William Brinkley
  • The Last Hurrah, Edwin O’Connor
  • Peyton Place, Grace Metalious
  • Auntie Mame, Patrick Dennis
  • Eloise, Kay Thompson
  • Andersonville, MacKinlay Kantor
  • A Certain Smile, Françoise Sagan
  • The Tribe That Lost Its Head, Nicholas Monsarrat
  • The Mandarins, Simone de Beauvoir
  • Boon Island, Kenneth Roberts
      1. Which ones have you read? Did you like them? Yikes! I think the only one I’ve actually read is Eloise, and that must have taken all of half an hour.  I doubled my "read them!" score when I looked at the nonfiction list for the same year — The Search for Bridey Murphy by Morey Bernstein and A Nun’s Story by Kathryn Hulme!
      2. If you haven’t read a single one, which ones have you heard of? Peyton Place, of course, and Auntie Mame.  I read Françoise Sagan’s Bonjour Tristesse and wasn’t terribly impressed.  All of these titles are vaguely familiar, at least, thanks to years of shelving in the fiction section!
      3. Will you be putting any of these books in your reading list? I had to look up most of the synopses on Amazon to answer this question — I might try Boon Island, an historical shipwreck/survival novel.  The Monsarrat looks very salacious, doesn’t it! — I wonder if the cover has anything to do with the actual story….

      Monserrat_tribethatlostitshead

    1. Kate Gilbert is, of course, the designer of the Pearl Buck Swing Jacket, currently being fêted here in this knitalong.  She recently took some time from her busy schedule — motherhood, magazine deadlines, unpacking! — to chat with us.

      What was your first sweater design like?
      My very first sweater design was a complete and utter failure. I never put it all together but I still have it. The body is basically a giant poncho and the sleeves are these stubby little things. You can see it here: http://www.kategilbert.com/blog/archives/2006/03/public_knitting.html  I had no idea what I was doing and had only made a (very ugly) scarf before.

      Are you a perfectionist?
      Definitely. I have to learn to let go of a pattern at a certain point because there are deadlines and it’s just not realistic to do things a thousand times. I would get tired of them and never finish them. Thankfully I learn something with each pattern I write and hopefully each one is a slight improvement on the last. Also, I’ve had to learn to let go of my patterns after their published. I’m always happy to see what people do with them. I like when knitters run with them and make them better. Sometimes, they choose a yarn or color or button that I would never have chosen, but I hope that’s what will make it “perfect” for them.

      What is most important to you as a designer — fabric, shape, texture?
      Is D) all of the above a possible answer? I think shape is really my main obsession. My first inspiration for a project usually comes from a certain silhouette that I’m trying to achieve. In the case of the Pearl Buck Jacket, the shape I was going for would have required a fabric that is probably nearly impossible to achieve with knitting but I decided to give it a shot anyway. Then, the yarn that was chosen for the project changed the shape, fabric and texture that was possible. It’s all a compromise.

      Where do you look for inspiration?
      Sometimes it’s a technique that I would like to try or use again. Sometimes when I see people from a distance, I think they are wearing something great and stalk them down to get a closer look. It usually turns out that they aren’t wearing at all what I thought they were so I try to create what I had imagined they were wearing. I guess I’m most inspired by a challenge though. I try to figure out if it’s possible to knit a certain shape, or rather, if I can figure out how to do it, since I imagine anything is possible and there are certainly people out there much cleverer than myself – those knitting mathematician people could probably knit anything.

      What do you enjoy most about your work? least?
      I love that feeling you get at the end of a project, you know, the one where you say, “I made that!” and you want to show it to everyone. Believe it or not, I also like the deadlines. I would probably never finish anything without them. I’m good at working under pressure and with restrictions. I practically never finish any of my non-work projects. If I can be honest, the thing I like the least is having to go back and reexamine a project when it’s done. By the time knitters are out there knitting up a pattern, usually at least 6 months have passed since I knit it and thought about it. I’ve usually finished a couple projects since then and am neck deep in something new. I find it really hard to go back and remember why and how I did something in order to answer questions that people email me. They often have a better idea of what’s going on in the pattern than I do.

      Is there a usual starting point for your designs? Do you plant it all out first or improvise on the needles?
      All of my projects start with a sketch or at least a vision of what I’d like to make. I’ve tried just sitting down and knitting something, but I’m not really that sort of person. I need to plan it down to the last stitch and then revise it on the needles. I’ve tried several times to make things that were randomly striped. I can’t do it. I always end up sitting in front of my computer planning my stripes so they appear random.

      What knitters have influenced you?
      Kaffe Fassett was my first big influence. I taught myself to knit when I was in high school using books that I had found in the library. Most were full of patterns that I wouldn’t have touched, especially as a 16 year old! It was only when my art teacher lent me his wife’s copy of “Family Album” that I realized there were all sorts of possibilities for using color and patterns in knitting and that yarn didn’t have to come from Walmart. More recently, Elizabeth Zimmermann never fails to inspire me.

      If you were to have a motto in life, what would it be?
      Try everything once – except organ meats.

      Kate blogs at Needles on Fire, and more of her patterns are available at kategilbert.com.  Thanks again, Kate!

    2. Francistowne_ariccia_1781_britishmuseum

      Francis Towne, "Ariccia" (1781), British Museum, London.  I’m afraid that this scan looks more than a little grey, but it was the only one I could find of this lovely little watercolor — the trees are actually a beautiful Italian dusky-green, against a pale creamy-blue sky.  Ariccia (sometimes spelled "Arricia" — Towne wrote "Larice" at the bottom) is an ancient town near Rome, redesigned in the mid-1600s by Bernini, whose dome of the church of Santa Maria dell’Annunciazione appears in the background here.

      Degas_carriageattheraces_1869_mfaboston

      Edgar Degas, "A Carriage at the Races" (1869), Museum of Fine Arts, Boston.  So elegant, so Degas!  I love the smoothness of the grass, the sheen of the horses, the combination of imbalance — the mass of the horses at the right against the near-emptiness at the left — and balance — the driver, the dog, the mother, the second lady, all focussed on the baby under the pale yellow parasol at the center.

      Cezanne_montsaintevictoireseenfrombellev

      Paul Cézanne, "Mont Sainte-Victoire Seen from Bellevue" (ca. 1882-85), Metropolitan Museum of Art, New York.

      Holbein_christinaofdenmark_1538_national

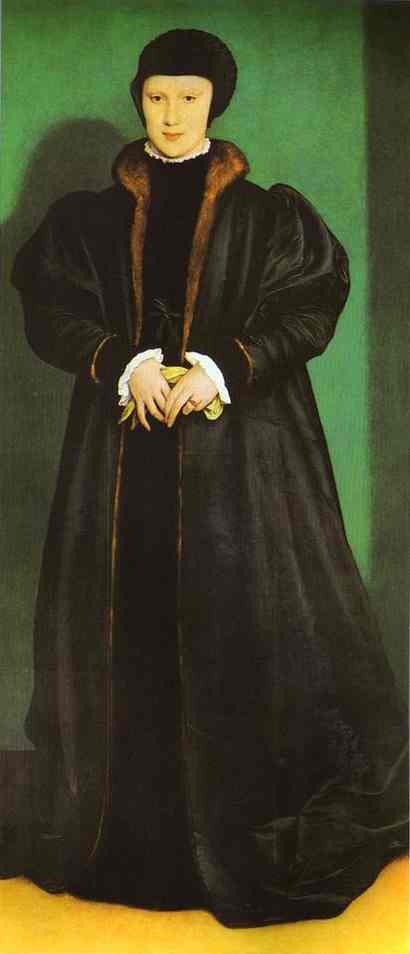
      Hans Holbein the Younger, "Christina of Denmark, Duchess of Milan" (1538), National Portrait Gallery, London.  A fabulous effort by one of my favorite portraitists.  The yellow floor and the green wall (with its mysterious shadow on one side), the wonderful flow and texture of her gown, her level, strong-willed yet rather seductive gaze — brilliant.  I love the story that when the suggestion was made that the young widow marry Henry VIII — who was then casting about for his fourth wife — she replied that if she had two heads, she might, but as it was she had only one.  Holbein has certainly given the impression of a girl who can hold her own on the Renaissance political stage!

      Bastet_26thd

      "Bronze Statuette of Bastet" (26th Dynasty, 664 BC-525 BC) Senusret Collection, California Institute of World Archaeology, Santa Barbara.  One of my most beloved possessions is a reproduction of a similar Egyptian cat from the British Museum.  This is an equally lovely one, although slightly different, mostly about the ears, which are pricked forward in the British Museum’s cat.  The serenity of this little cat appeals to me greatly, and the way that the artist has captured the essence of cat-ness.

    3. Ezmittens1

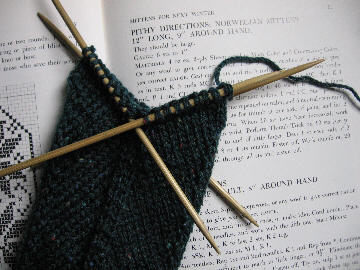
      Elizabeth discusses a variety of mittens in this chapter of the Knitter’s Almanac — thumbs at the side (thus at first interchangeable for right or left hands), thumbs that fold naturally against the palm, Norwegian-patterns on front and back, and the ones that I knitted this week, mitered ones that shape themselves into a point at the top.

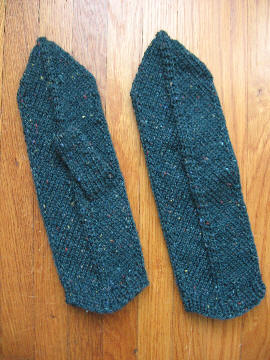
      I used two balls of Cleckheaton Machinewash 8 Ply Crepe, in a bright teal green with colored flecks, which I fondly imagine would be lovely against snow, although I don’t know if living here in Southern California will give me much chance to find out!  The miters, alternating an increase and a decrease, shape the mitten very prettily.  At the spot where you want the mitten to curve around the ends of your fingers, you simply eliminate the increases at the sides and continue with the decreases, which pulls the sides of the mitten into a point at the top — which discovery cheers Elizabeth enormously!

      I added one more decrease round at the tip, because it was easier to graft that way, and it made the grafting all of a piece with the line of mitering up the front and back — thus,

      Ezmittens2

      Elizabeth also digresses a little onto the subject of color, with which mittens are an ideal means of experimentation.  Do people see the same colors differently, and does this account for the different preferences for the same colors that people have, she wonders.  And associations with certain colors can matter enormously — "For years," she says, "I loathed purple because it was the color of a droopy and voluminous hand-me-down coat I had to wear"!  Mittens, since they take so little wool, can be a way to try different colors, or combinations, of course, with little emotional or financial investment!

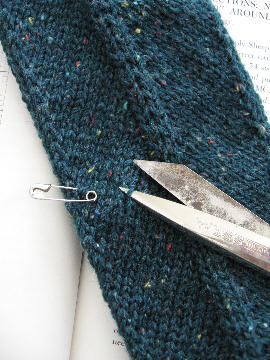
      You snip a stitch where you want the thumb to go, and unravel a bit (I was amazed at how easy this was, after cutting the Aran last January — I was quite blasé, and snipped without a second thought),

      Ezmittens3

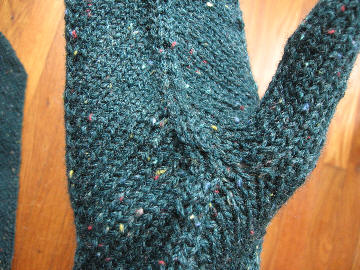
      then pick up 15 or so stitches and work the thumb in the round.

      Ezmittens4

      I put the thumbs a bit low, I realized afterwards, and would recommend that you judge by the spot where your thumb connects to your palm, not at the bottom of your thumb joint (this part is a little vague in the book).  That spot will be at the outside edge of the mitten, keeping in mind that the miter will cause the unravelled row to run downwards at a 45° angle towards the center of the mitten.  (You will need to mark the spot at the edge, and then follow that row down to the middle of the miter, because you need to snip in the middle and then use the unravelled ends to reinforce the edges of the hole, as in the photos above.)

      I added a bit of length to the thumb to compensate for the smaller gauge of the Cleckheaton, but that was all.

      I found that the easiest way of sewing in the ends was in fact to wear the mitten, which gave the odd but amusing sensation of sewing on my own hand!

      Ezmittens5

      These are not perfectly anatomically correct mittens, and this is something of a detraction, for it means that the thumb when worn pulls the miter away from its line —

      Ezmittens6

      but on the whole, I think that the sheer ease of this pattern is much in its favor.

      Ezmittens7

      "Stash them away as they are finished, and when the time comes, next winter, you can deal them out with a liberal hand"!