• 0925

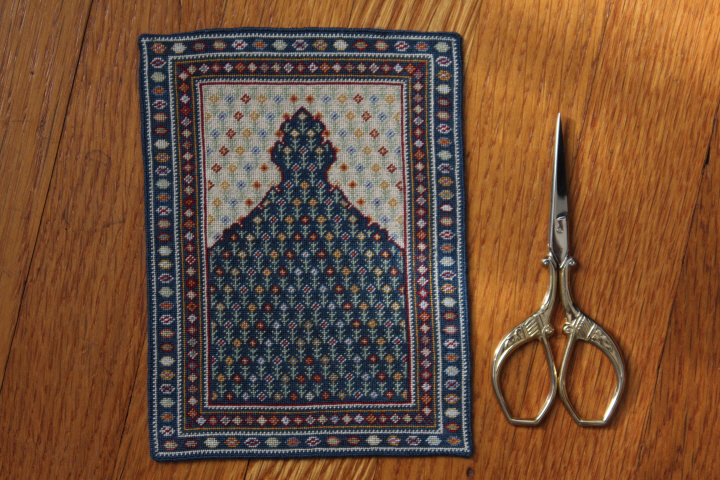
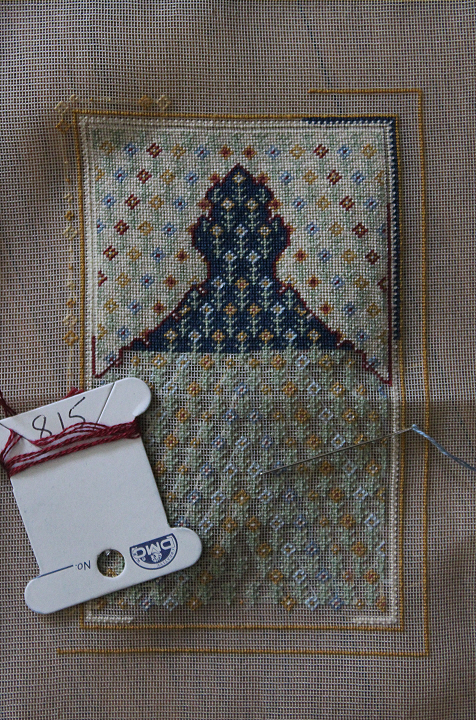
    I have been utterly delighted with this piece from start to finish, I admit.  It has always been one of my favorites in Frank Cooper's book — Oriental Carpets in Miniature — and so it was a pleasure to add it to my queue at last, and then to work it, and even better, to have something charming to make in these worrisome times.

    0916

    Here again is the late 18th-early 19th century original now in the McMullan Collection at the Metropolitan Museum of Art in New York (accession no.1970.302.8) —

    DP166864

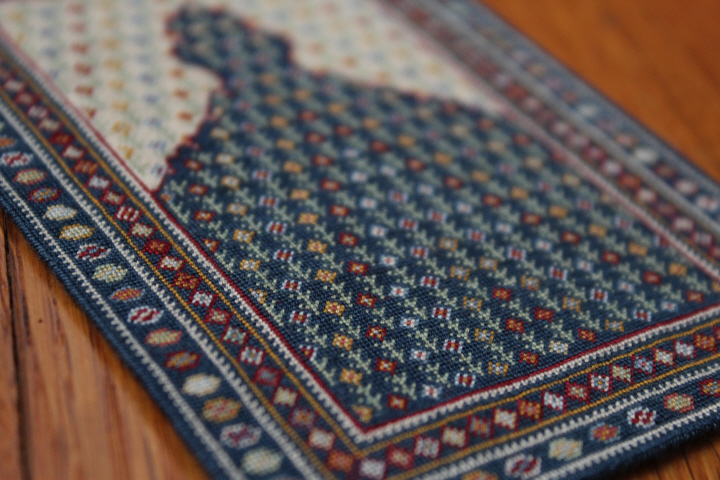
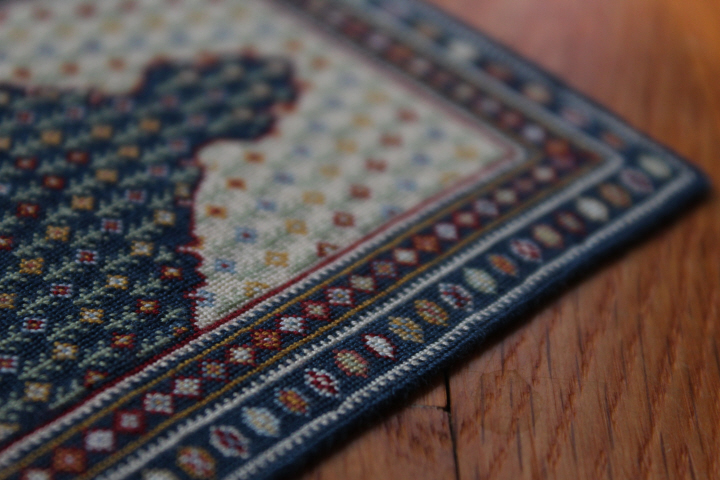
    I think Cooper did a fine job here, reducing and (necessarily) simplyfing the design without losing any of its charm.  It is my good luck that he worked his version on 18-count canvas, and that converting that to 40-count silk gauze — which was only a matter of my using a different fiber, one strand of DMC floss instead of Paternayan crewel wool, and converting the colors — makes the rug a more-delicate scale for 1:12 miniatures, and very like the original proportions of a prayer rug.

    For colors, I used these —

    • dark blue 3750
    • medium blue 931
    • light blue 3752
    • ivory 3033
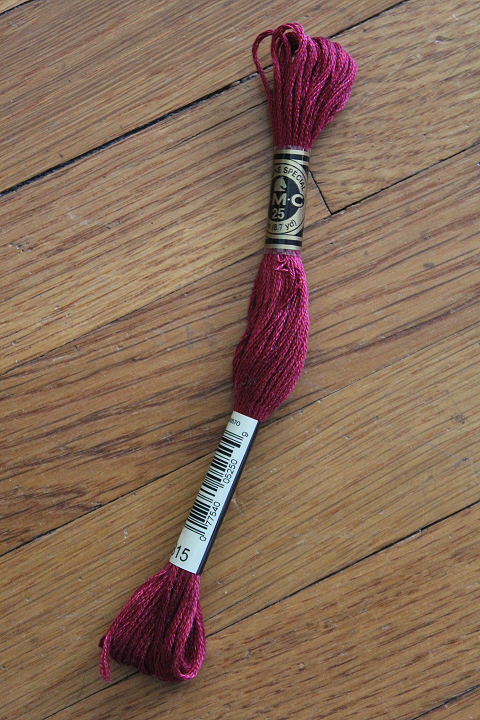
    • red 815
    • green 523
    • gold 680
    • yellow 422
    • coral 3722

    The green and light blue are very pretty but together their value is so similar that it isn't easy to distinguish them, so perhaps a darker green might have been better — though on the whole, I don't think it spoils the effect at all.

    I worked mine in continental stitch, which I find makes a neater back and an all-around more pleasant experience than working half-cross in tiny scales!

    0918

    0917

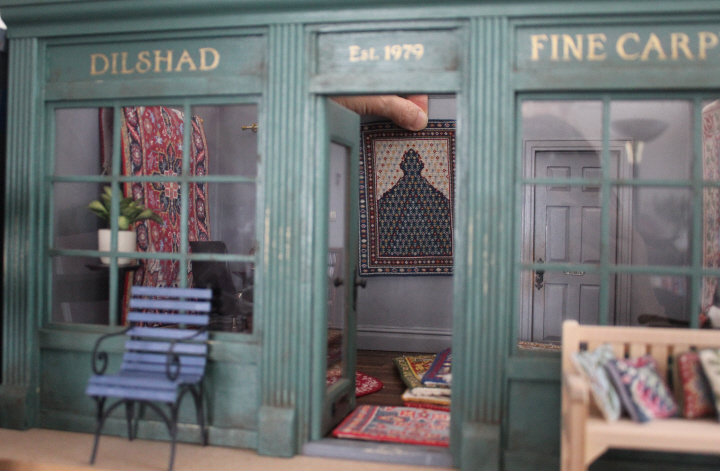
    This has always been meant to have pride of place in the carpet shop, so the next thing is to install it!

    0953

  • 0908

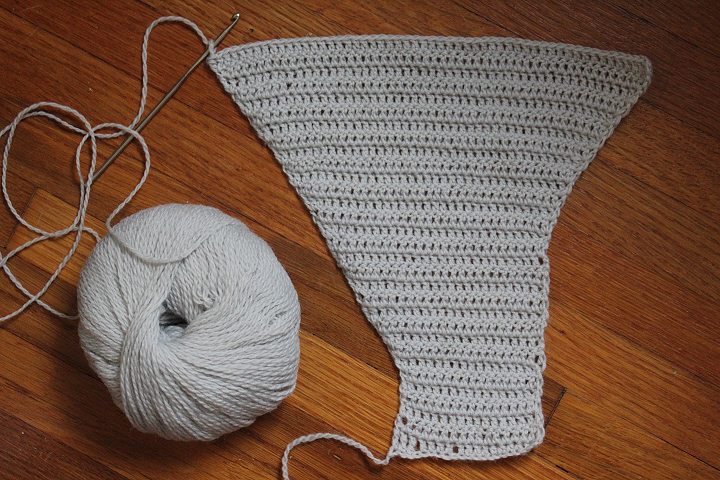
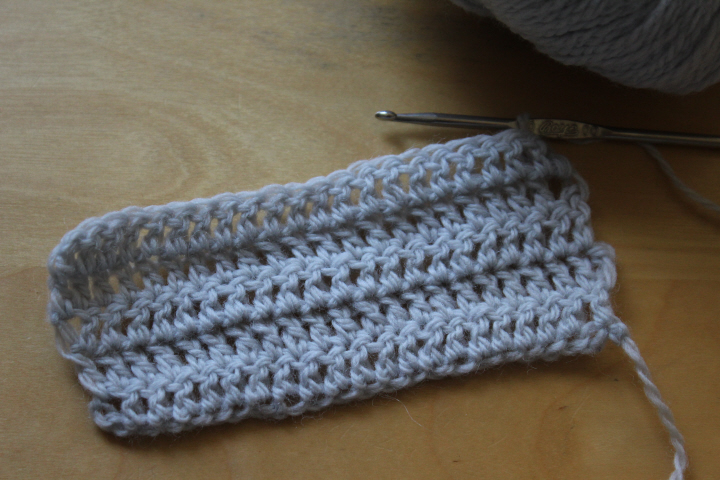
    This is the back of the DROPS 118-26 vest/waistcoat/sleeveless cardigan/thingy, for which I decided to use the Knitpicks Palette that my mom decided she didn't want any more.  I started this a while ago, then waffled about it, then decided the other day to carry on.  I got down to the lower edge of the armscyes, shushing the inner voice that said "it's too small, something isn't right," then laid it out like this and knew at once that it is indeed far too small.   Part of that, to be sure, is that between "a while ago" and "the other day" I forgot which hook I used to work my gauge swatch, and then picked up the wrong one — smaller, of course — but part was that the instructions do indeed tell you to work 5cm before beginning the increases for the bottom of the armscye, when clearly 5cm is nothing in the world of armscyes.  I decided that, joy of joys, I am confident enough to adjust a crochet pattern to fit me, and so in looking around for some advice about shaping armscyes and coming across Elinor Brown's article and the calculator linked therein, I worked out that I need to have 5 inches, not cm, before (because it is worked top-down) beginning the increases.

    And so the piece in the above photo was ripped out and re-worked into this — which is the right front, instead of the back, being a smaller piece to work before I judge whether the alterations will be sufficient —

    0934

    I figured that since I was ripping it out to modify the pattern anyway, I might as well shape the shoulder while I'm at it, so I worked a graduated set of SC, HDC, DC, and TC across the 17 sts of the first row (to be worked in the opposite order for the corresponding back shoulder). 

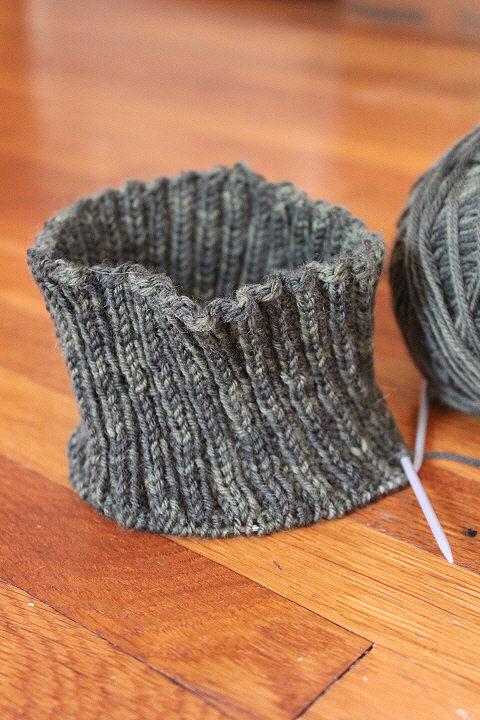
    And in knitting news — because, glory be on this knitting blog, there is some — David asked for a ski-helmet liner for his birthday, so I've got the beginning of one on the needles.  I can hardly bear to confess how many stitches I've had to ladder and pick back up in the proper direction because I'd purled instead of knitted here and there, but it was a lot.  Oh well, dark green wool in distracting times! there it is.

    0928

  • 0892

    Well, I'm much happier with this! 

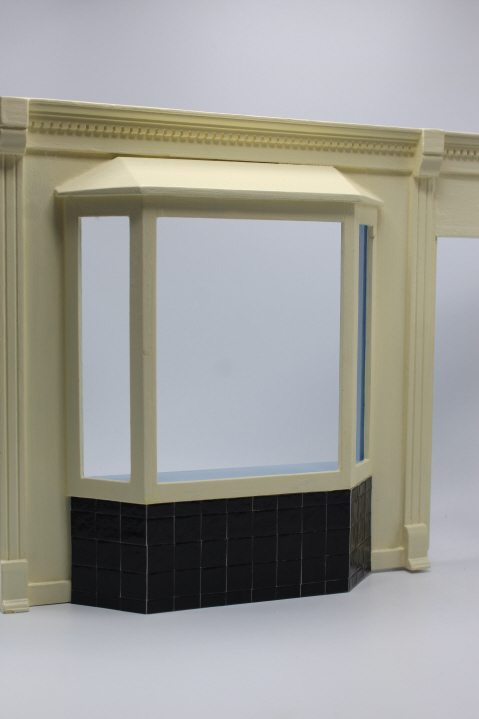
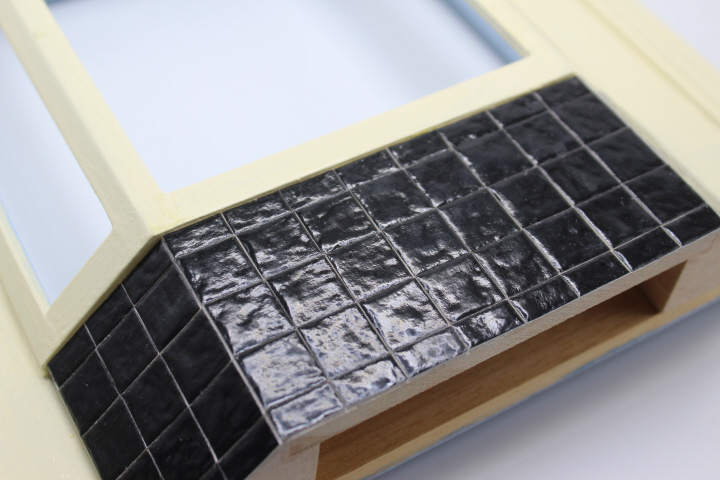
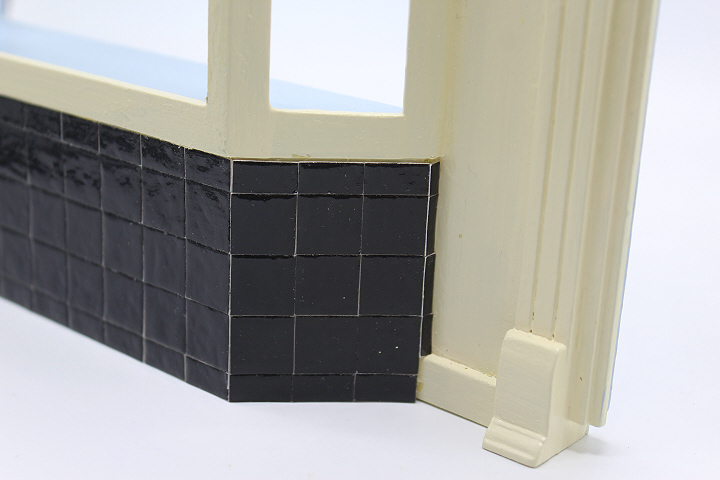
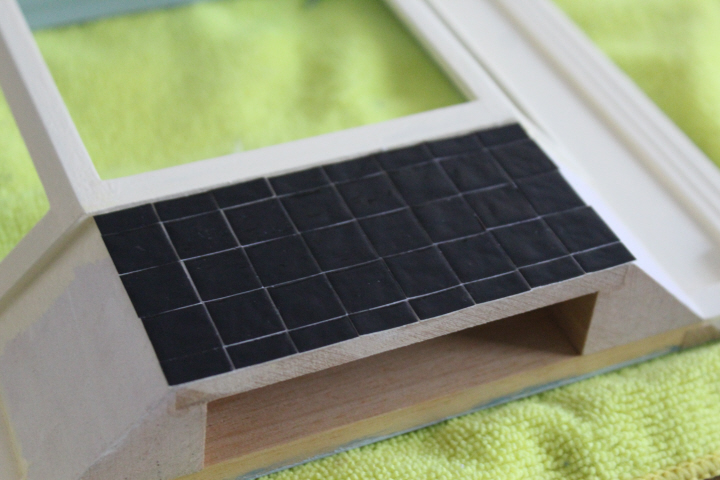
    Per my experiment, the tiles are made of watercolor paper painted with FolkArt Milk Paint ("Pirate Black," rather unsuitably!), "glazed" with Mod Podge in the satin finish.  They aren't perfect, obviously, but a great improvement on the previous attempts.  The tiles are individually glued to a piece of drawing paper, pre-folded and trimmed to fit over the corners and molding, then the whole assembly glued in place.  I didn't get the edges quite as flat as I would have liked, but there it is — perhaps from a bit further away than these photos are, it won't be so apparent!

    I will probably age it a bit, though not as much as the carpet shop as that is meant to look somewhat run-down, while this is "newer"!  Still, it should probably have a bit of dirt here and there …

    0893

    0894

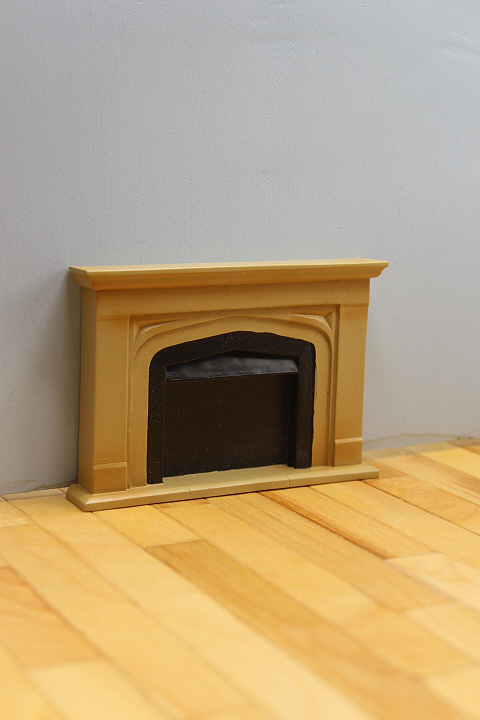
    I am amused to find that I am becoming much more nonchalant about re-making miniatures — I wanted to put a fireplace on one wall of the tea shop, and fell in love with the shape and reasonable price (especially with a coupon!) of this Tudor-esque one —

    0870

    which has a very simple-yet-handsome arch, but wasn't quite what I had seen in my mind's eye.

    Elizabethan_Fireplace _Little_Moreton_Hall cropped

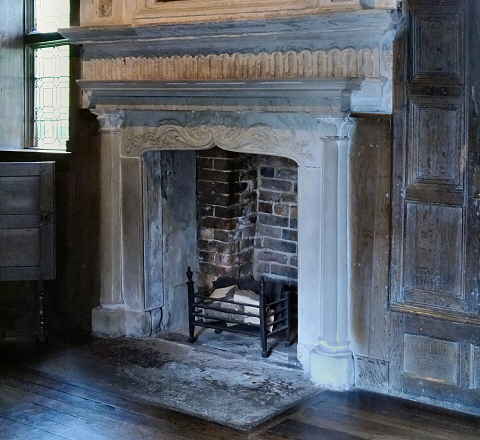
    Not that a Georgian-ish/early-Victorian shop would originally have had an Elizabethan fireplace, of course, but let's say some recent owner of the shop was loitering around an architectural salvage yard (as one does) and came across a small one, either Elizabethan or Revival, that would fit in a tiny shop — well, I would buy it!  I didn't really care for the Houseworks fireplace's sandstone color, when what I was picturing was more limestone, like Little Moreton's above, or even better Dorney Court's, and so I decided to paint it. 

    0884

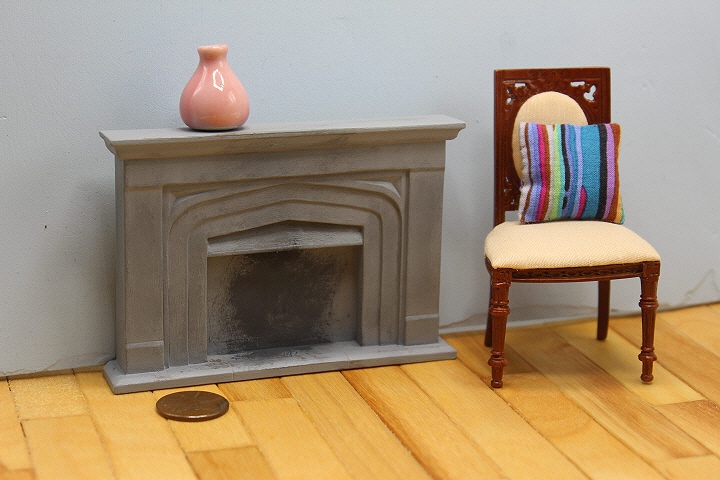
    The best grey I had turned out to be the same one I had used on the interior of the carpet shop, with some aging and soot in dove grey, brown, and black.  I might actually put a bit more "smoke" on it.

    (The pink vase looks huge, but actually it is the fireplace that is really very small — you can tell by the relative size of the 1:12 chair!)

  • 0874

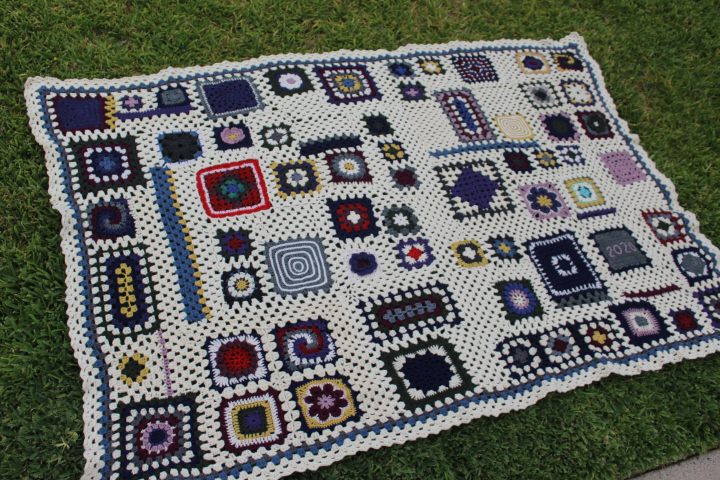
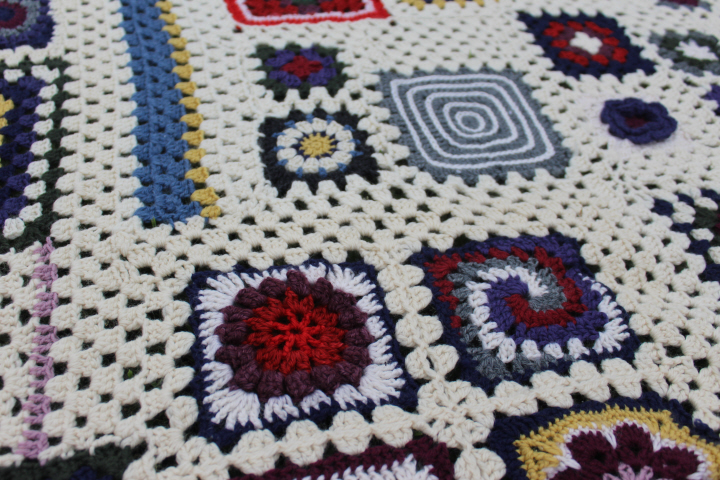
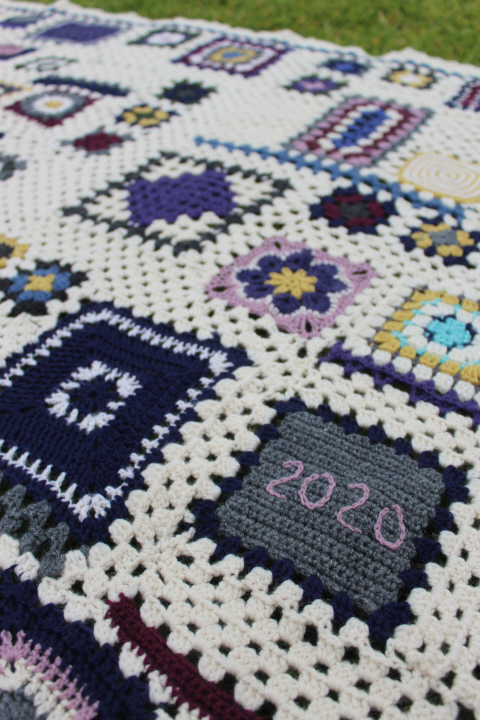
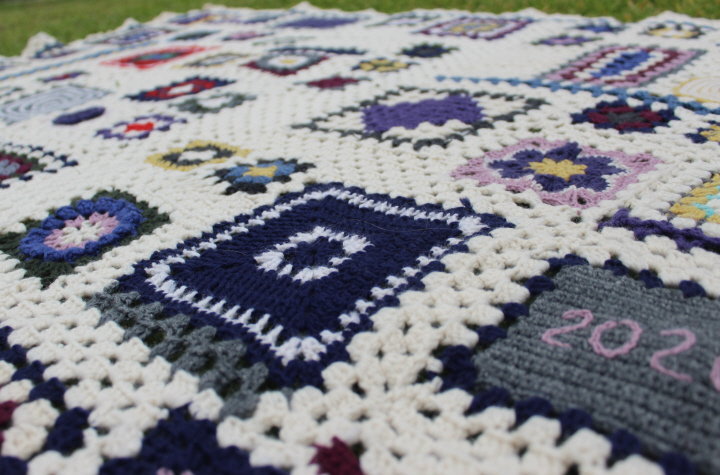
    I just realized that I haven't written this up yet, so I "borrowed" the lawn next door for a quick photo session this morning, and here it is!  This is of course the Granny Square Sampler Afghan, following the project led by Blair Stocker in 2012.  (There is also a Flickr group, for more inspiration.)  I really enjoyed this, and learned a lot about crochet — which was the point, after all. 

    There are two different join-as-you-go methods here — one (demonstrated here by Annette of My Rose Valley)  that is more-or-less adding another round of granny clusters to a square but instead of working a chain st or two in between, reaching up to work one of those ch sts through the ch space in the square you are joining to, and another method (demonstrated here at Carina's Craftblog) in which you work another row of granny clusters but alternate attaching it to the bottom square or the top square, essentially flipping every other cluster "upside down".  I like both of these methods, but I think that with my "crazy" layout, the "flipping" one was much more efficient, and so after joining two sets of four squares with the former, I found myself using the latter method for pretty much everything else.  I think I made it a bit harder on myself by joining the squares free-form, as there are a number of slight wobbles all over, due to fiddling the number (or size!) of clusters, but wool, bless it, blocking disguises any number of irregularities.  If I do another of these — and why not, it's a great stash-buster, and would certainly never be boring — I will probably use Adaiha's tutorial for joining squares of different sizes.

    0875

    I didn't use one of the squares Blair did, and added in some, including "Nana's Latte Square", which I will definitely use again (I love the soft neutrals in solid squares, in the photo from PDKlein on the Ravelry page). I really liked the Granny Wheel Square, so much that I made two in quick succession — it's interesting how a color change can give a quite different effect.  The "little bit of white" in single crochet on my first one (now towards the upper right corner) isn't really enough, but the speckly line is not uninteresting.  The other "new" square is Granny On Point.  Inadvertently, I didn't really follow the instructions, because I was looking at a photo of someone else's square in the Granny Sampler photo pool at Flickr at the same time, and found myself, to my later amazement — I don't crochet! really! — following the photo as though it were a chart of instructions.  It's that light-bulb moment, when after months of not understanding what you are doing or quite what you're looking at when you've done it ("is that a double-crochet or a triple? wait, how do you make a half-double, where's my cheat sheet …") things finally begin to make sense.  I used different borders on each of them, because I could.

    0877

    0882

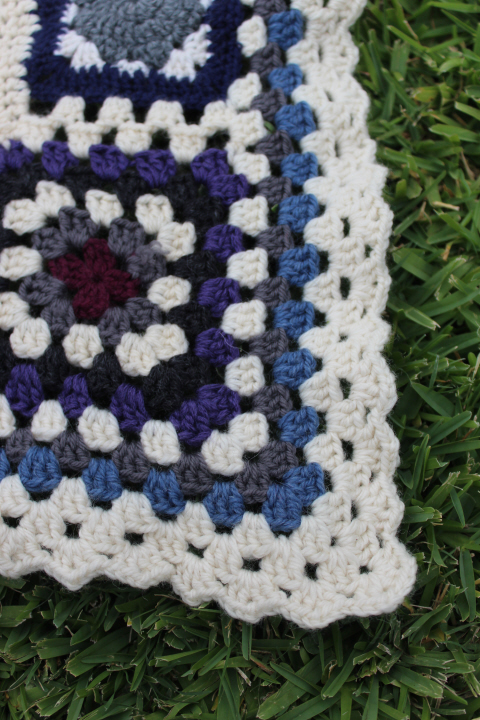
    For the edging on my afghan, I used the brilliantly simple variation on granny clusters by Jacquie at Bunny Mummy, which she calls Double V Edging.

    0880

  • 0438

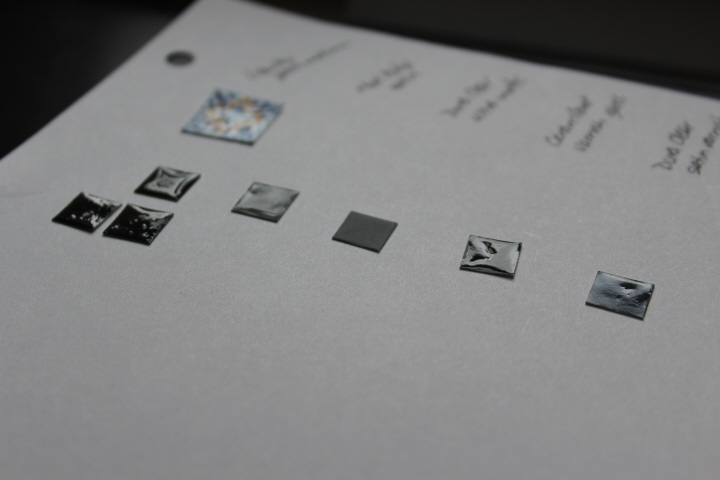
    Wondering why a previously-successful process didn't work very well at all twice in a row, I decided that I should just do an experiment.  Since I have a number of different kinds of varnishes in my stash, I got out some unvarnished paint-chip squares that were left over, and tried every one of the varnishes, partly to figure out why the artists medium didn't work and partly to audition a different varnish.

    The results were quite interesting, actually.  I stuck my samples on a piece of card stock, so that I can have a record of the various finishes — at the top in the photo above is one of the leftover tiles from my very first batch, as charming as it was the day it was made!  Below it, on the far left, are a cluster of three of the faux tiles varnished with the Liquitex gloss medium I used originally, then Mod Podge satin finish, then DuraClear ultra-matte, CeramCoat gloss varnish, and DuraClear satin.  They were all smoothly covered when the varnish was newly-applied, so the dips appeared during the drying process for some reason I don't know yet — I applied it intentionally quite thickly, by the way, so these flaws might not appear if applied thinly.  The DuraClear ultra-matte is ultra-matte, indeed! but too matte for my purpose, though beautifully smooth and even.  I wasn't willing to risk large irregularities like the CeramCoat sample, so that one was probably out, too, at least for now.  This left the Mod Podge satin finish and the DuraClear satin, both of which probably would be successful, but the Mod Podge was still a bit tacky the next day, and indeed the instructions say it might be, and recommend a varnish top-coat, so I decided to use the DuraClear even though the Mod Podge had just a bit more depth to it, which to my eye looked more like a real glazed tile.  But by the second day, the Mod Podge sample was not tacky at all, and so I changed my mind and used the Mod Podge after all.  (I figured that if the faux tiles were still tacky after a few days, I could varnish them with the DuraClear satin …!)

    My conclusion from this experiment is that the Liquitex gloss medium is just getting old.  I bought it and first used it in 2014!  It has worked fine only a month or so ago for "varnishing" faux paintings (printed on paper with the computer), so I'm guessing that enough of the water in it has evaporated over time that when laid thickly like this, it just doesn't set as well as it did when first opened.  (The first batch of mini tiles I glazed a month ago are still tacky, in fact.)  It's also possible that the water content helps it to self-level while it is drying, and therefore the bubbles and irregularities "stick" instead of smoothing themselves out.

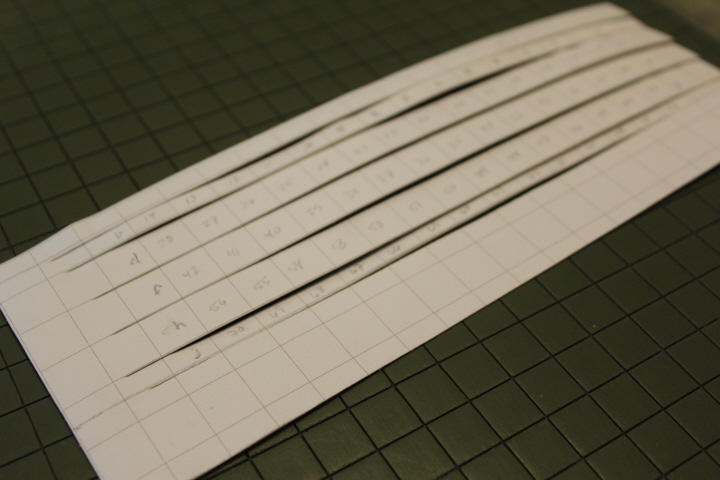
    And so I made a third set of tiles — but this time, I had been scrolling, rather disheartened, through photos of "tiled shop fronts" on Google (as one does), and seen one with a sort of self-border of half-tiles, and thought it looked very handsome.  And … if I did rows of half-tiles along the top and bottom, I could make them bigger and still have an odd number of rows!  The only remaining problem was that of getting each square the same height and depth as its neighbors.  I cut a piece of watercolor paper a good bit bigger than the area to be tiled, painted it with FolkArt milk paint in "Pirate Black" (!), and tacked to the back of it a piece of 1/2" grid paper.  Instead of cutting the painted area into strips and then cutting each of the strips into squares — which is what I did before, resulting in ever-so-slightly different "squares" — I numbered the squares on the unpainted side before cutting, enough squares to fit the space to be tiled, then used my big paper-cutter to cut along the horizontal lines but only almost to the edge, leaving them still attached to each other at one end.  Then I turned the whole thing clock-wise 90 degrees and cut along the other set of lines, this time all of the way (because I could put them back in order using the numbers).  This was more than a bit awkward, obviously — I had to make sure that all of the partly-cut strips were flat and butted up closely to each other, so that the second cuts would be in the right place, and the grid paper didn't stick very well so that I had to carefully peel it off of each cut square and write the correct number onto the back of the square! — but it wasn't as onerous as it sounds, and it achieved the result I was hoping for, a nice straight set of squares that line up evenly, and in both directions.
    0440

    0441

    The Mod Podge, just like the artists medium in my very first set of faux tiles, took on some of the texture of the watercolor paper, which is fine with me.  I'm very pleased with the satin finish, too — it has enough shininess to say "glazed tiles" but not so much that it's distracting or reflects irregularities.  Now that I have a better idea of the predicted-success-rate, in future I might try a smooth paper — the paint chips are worth using again, for instance — or something more Arts & Crafts/"hand-painted" like a watercolor wash.

    So I'm happier with the finish, and I'm happier with the new size!

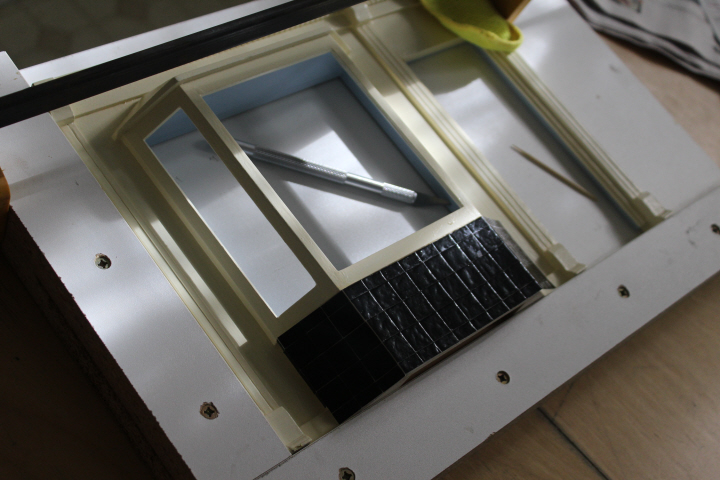
    (The façade developed a crack running from the upper left corner of the door frame through the cornice molding, so I've pulled it apart and reglued it, which is why it's clamped now.  The tiles are not attached to the bay window yet …)
    0448

  • ,

    Trivet Pursuit

    0454

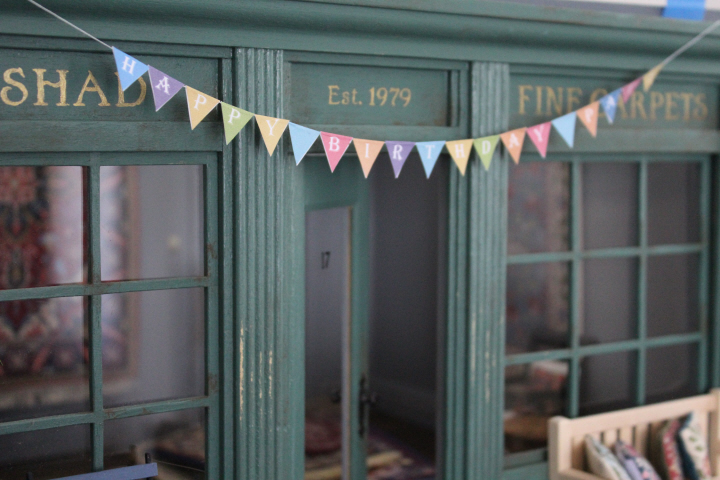
    Well, not much has been happening around here, to be honest.  One of my miniatures club members had an 80th birthday recently, with a Zoom "party" — I made this 1:12 bunting and delivered it earlier in the day in lieu of a card.  I thought it turned out pretty well for a spur-of-the-moment birthday greeting. 

    0452

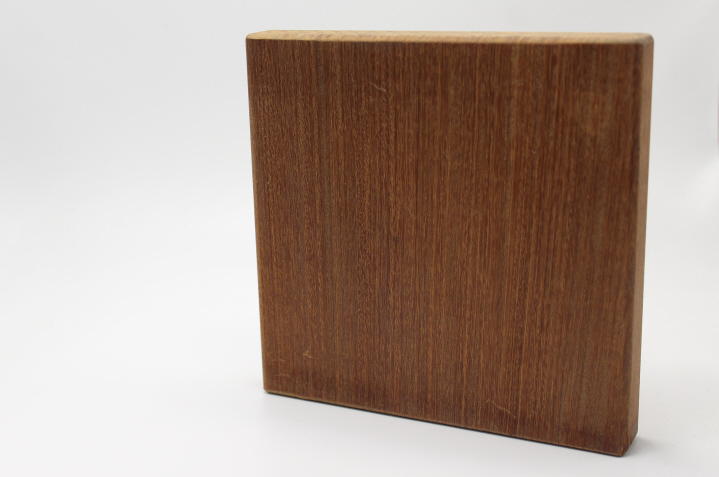
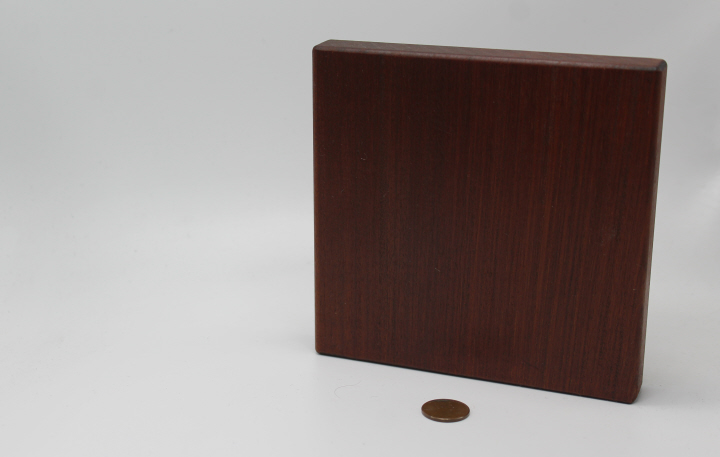
    David is reorganizing his workshop in the garage, and was tossing this piece of ipe wood into the scrap box.  Some years ago we replaced a tiny concrete patio with a small deck (so that we could have a French drain underneath to direct water away from the lowest point on the property, which is right in front of the door to the garage), and said deck is made of (responsibly-harvested) ipe.  Even as a piece of scrap wood, ipe is extraordinary stuff.  It is surprisingly heavy, being very dense, and when newly-cut has a lovely auburn color with a fine but distinct grain.  We let the deck age naturally, so it's now a sort of ashy brown, but I decided to oil this scrap and use it as a trivet.  David rounded off the edges of the ends for me, to match the sides, and I sanded it and put two coats of linseed and beeswax on it.  You can't quite get the full effect from the before and after photos, unfortunately, but now it's smooth with just a hint of the grain under one's fingertips, and with the auburn color deepened beautifully.

    0457

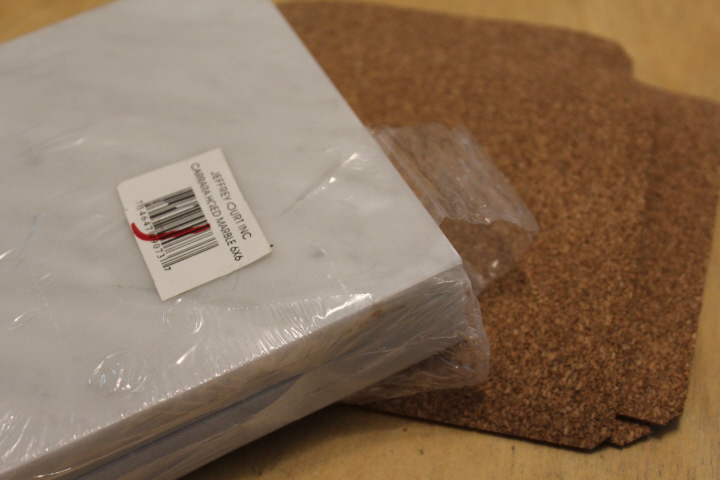
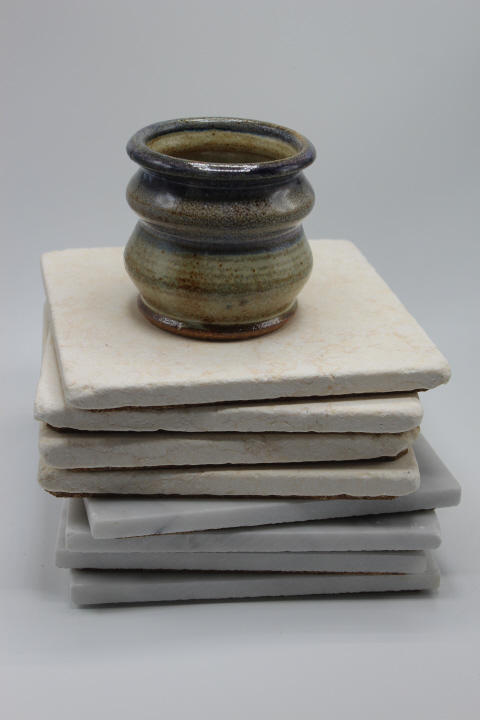
    This inspired me to finish another project that had been sitting around for far too long, two sets of tiles from the bargain bin at Home Depot, four squares of something stony that I can no longer identify, and four squares of Carrara marble.  Laura had managed to get some cork for me — a bit more and a bit thinner than I wanted, but needs must — and I cut squares just smaller than the tiles and rounded the corners, then glued it to the back of each tile.  The reason I had left it so long was because I was agonizing over what kind of glue to use — Aleene's Tacky (of which I have an inexhaustible supply since I get to take home the leftovers from day camp each summer and never manage to use up the four or five bottles before the next year's four or five bottles land in my box)? it's a workhorse around here, but is it right for trivets?  E6000? it's supposed to be really strong, but gosh it's smelly — so now I just threw caution to the winds and used Crafter's Pick Ultimate.

    0458

    And so suddenly I've gone from having no trivets to having nine!

    0464

  • Famous ingrid bergman

    Ingrid Bergman again, looking very summery.

    Famous loretta young

    Loretta Young, perhaps not quite managing that heel turn?

    Famous mc

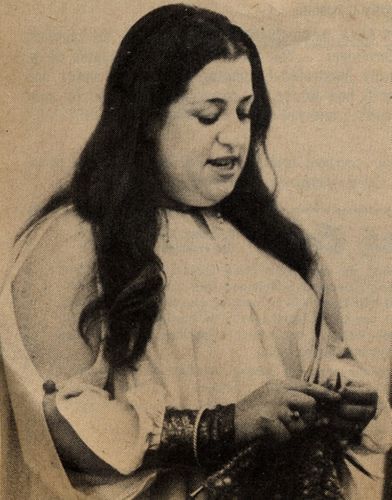
    Cass Elliot.

    Famous meryl bridges of madison county

    Meryl Streep, either in "The Bridges of Madison County" (1995) or on the set of it.  I've heard, by the way, that later she knit the shawl she wore as Sister Aloysius in "Doubt" (2008), so there's a bonus for this post, a bit of "Knitting in the Movies"! —

    Doubt 2
    Doubt 2
    Doubt 2

    Famous nw

    A very young Natalie Wood.

    Famous queen victoria

    Queen Victoria, of course.  Presumably she learned to knit as a girl, but certainly she's far more often seen crocheting.

    Famous shirley

    Shirley Temple.

    Famous tt

    Tasha Tudor.

    Famous greer garson

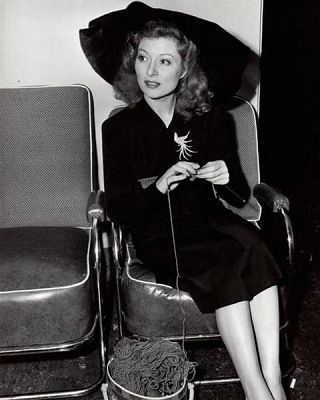
    Greer Garson, apparently with great sang froid knitting straight from the skein.

    Famous veronica lake

    Veronica Lake.

    Anne frank ca1941

    Anne Frank, ca.1941.  I don't see any needles at all, so possibly she is crocheting, but in her diary she mentions knitting.

    Famous dd

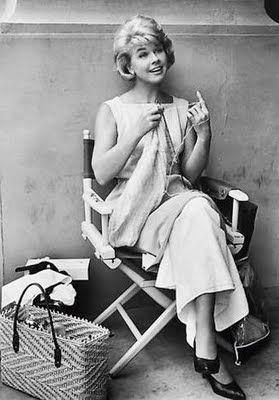
    And Doris Day again, twice, early-ish in her career and later-ish —

    Doris day

  • ,

    Bookmarks for Moms

    0401

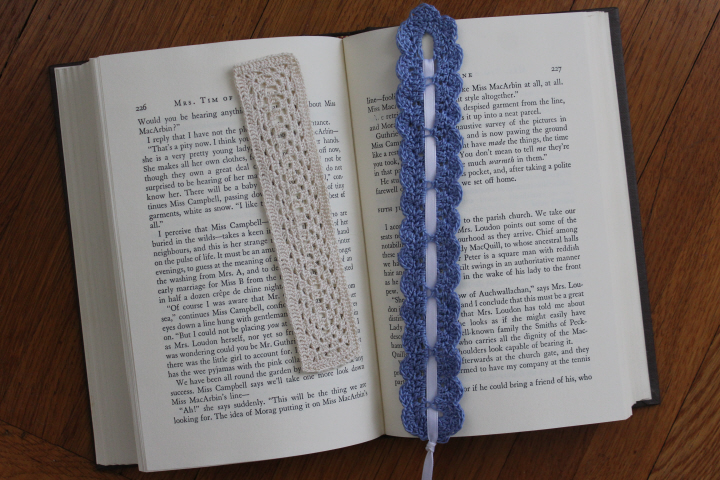
    You'd think that with all of the time on my hands these days I might have started earlier with homemade Mothers' Day presents, but alas, no — my excuse is that I thought I had another week!  I had decided to make some bookmarks, being eminently mailable as well as useful.  Luckily my "swatch" one was good enough to use for the real thing, so I only had to stay up late last Thursday night madly crocheting another one …

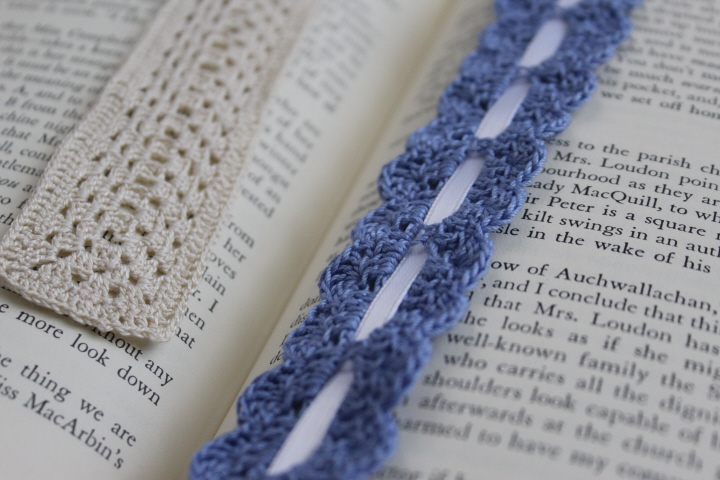
    The one on the left is the Rectangle Granny Bookmark by Deb of Neatly Tangled, in ecru DMC no.8 perle cotton.  This one has a new-to-me method of starting in the center, making sort of ur-clusters in the set-up row ("DC in each of the next 3 chs"), then working the granny clusters along the bottom (chain) edge and careening round the end to work another line of granny clusters along the other edge.  I might wish I'd done this in two colors — maybe the edging in an elegant white — but there it is.  It has a handsome plain simplicity this way, at least.  The one on the right is the Pretty Lace Crochet Bookmark by Kara Gunza of Petals to Picots, in I think no.10 crochet cotton (lost the ball band long ago …) in a lovely light blue.  I'm not sure why the scallops aren't symmetrical — presumably my own doing, as they look alright in the original photo!
    0400

  • 0406

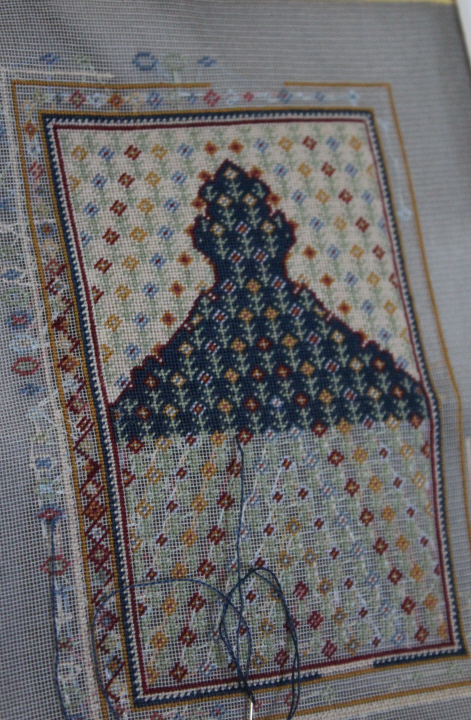
    Here is the status as of this afternoon of the main projects I've got going.  I usually wake up early most mornings, and so after breakfast I stitch for an hour or so on the miniature Kurdistan prayer rug, before I put in my contact lenses.  I continue to find this an utter pleasure to work.  The strange white diagonal lines are the traveling threads on the back!

    0420

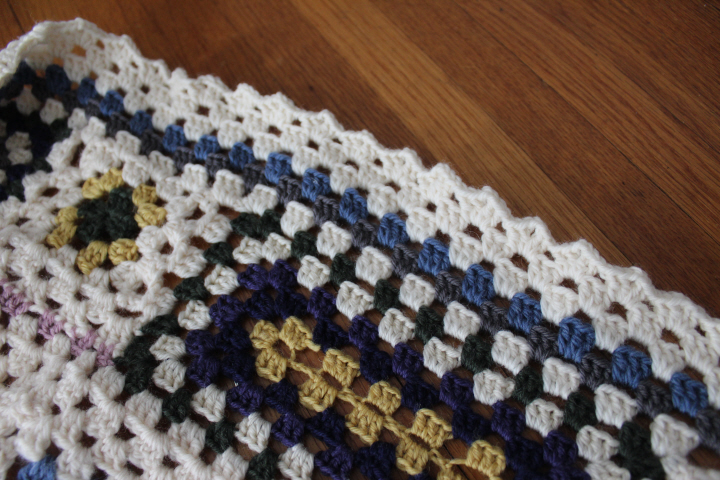
    Granny Sampler Afghan all stitched together — at last, she said wearily — and the border almost finished.  Still have about two-thirds of the ends to weave in, though.  Sigh.  On the bright side, it was looking very, um, extemporaneous for a while, and looks much more cohesive now, so I'm quite pleased with it.

    0404
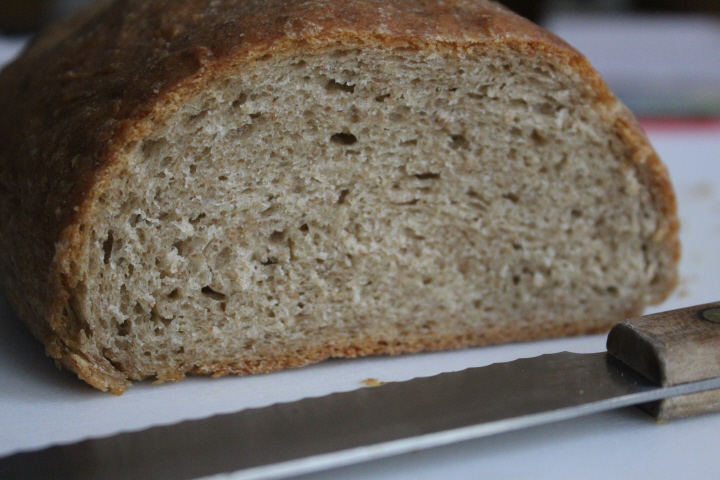
    A loaf of Finnish rye bread, from Nigella Lawson's How to be a Domestic Goddess — amazingly easy, since there was almost no kneading, to my surprise.  Even better that it tastes delicious and used 180g of the rye flour that's been lurking in my freezer for years.  (I might have to buy more now, actually, this is so good.)
    0412

    Swatching with the KnitPicks "Palette".  I wrote here quite some time ago that I wanted to knit the Victory Jumper with it, and I still think the yarn would suit the pattern well, but I think what was bothering me at the back of my mind so much that I've left it for a full year was that it's just a bit itchy to want to wear against the skin.  What I'm thinking now is something more like this lacy waistcoat/vest from DROPS …

    0422

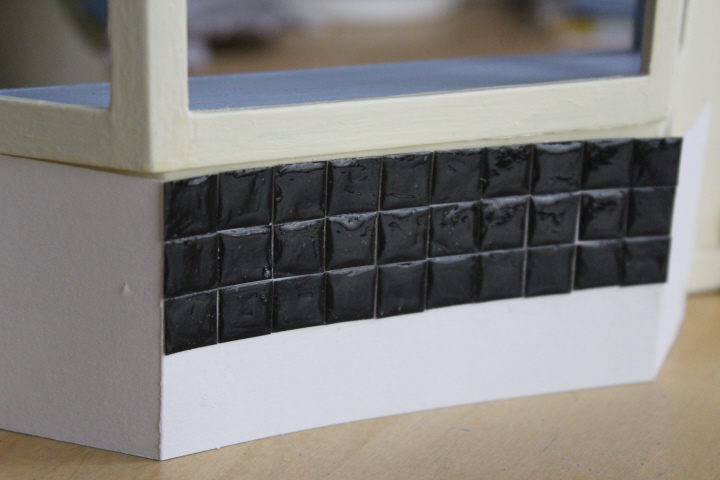
    These faux tiles would obviously look a bit more "realistic" when attached more snugly — I've started gluing them to a paper base, which is curling a bit when just propped up against the front façade of the tea-shop-to-be — but I'm just not very happy with them, I'm afraid.  I could live with the uneven surfaces, but the fraction-of-a-fraction difference in sizes is quite glaring at 1:12 scale.  So it's on to plan B, but unfortunately I don't yet know what plan B is.

    0408

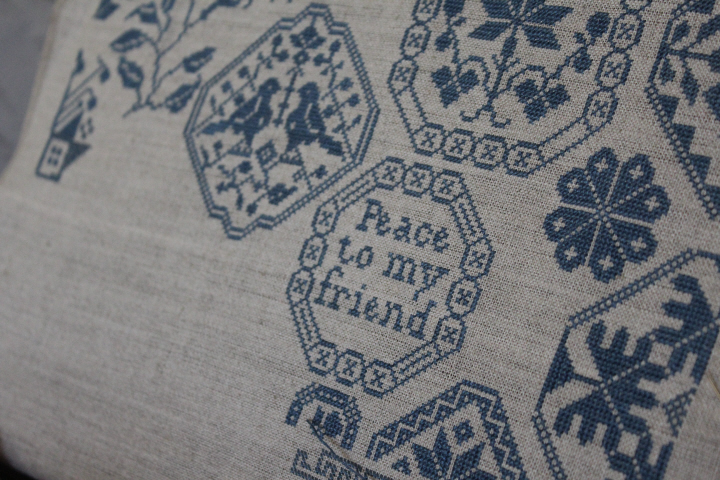
    Still pretty happy with this.  I'm really fascinated by Quaker samplers — I think what pleases me most about this particular one (aside from the ligatures, of course) is the combination of complex motifs with serene colors.  I've made a few tweaks of the chart here and there, and haven't yet filled in the empty spaces with their smaller motifs.

    0413

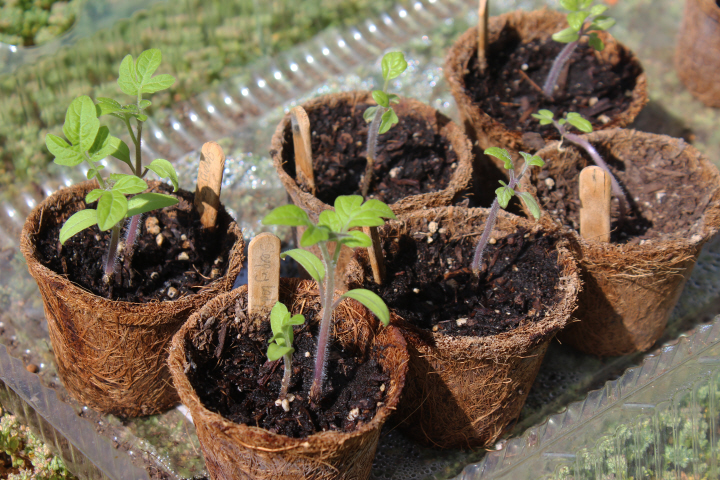
    Tomato seedlings, hardening off the last few days before getting planted.  Some of the seeds didn't sprout along with their brethren, and so I put another seed in those pots — then lo, up came the first one! and now some of the pots have two seedlings.  With limited space in my two new raised beds, I had ordered seeds of two heirloom dwarf varieties, and then the seed company sent a third packet "similar to my selections" free, so I have eight little pots altogether, the purple cherry tomato "Dwarf Velvet Night" and the bicolor beefsteak "Dwarf  Beauty King," plus "Dwarf Sleeping Lady".  (I think I wrote "Sleeping Beauty" on the stick!)

    The arroyo lupines and the lacy phacelia in our front garden are looking a bit decrepit now, since being the first ones to appear they have been setting seed for some weeks, but the mountain garlands are in full glory at the moment — I think they are what I was most looking forward to, so it's lovely to gaze across the field of them (stopping before one's eye gets to the line of cars perpetually resident along both sides of the street these lock-down days, as so few of our neighbors are going anywhere at all).  Though this photo doesn't really convey the delicious colors (nor the hum of the delighted and slightly drunken bees), I've left the photo full-size, so you can get the full effect!  The shrubs that I can still find (!) are all doing well, and the little California wild rose has buds on it, hurray!

    0417

  • Ups and Downs

    0389
    Little blessings seem to mean a lot more these days.  I generally keep this blog apart from the messes of life — not so much the little messes, dropped stitches or painting mis-steps or the knitting projects that just don't work no matter how many alterations one tries, those are all part of making things — but the world is a bit too much with us at present.  David has been furloughed, along with thousands of others who work with him and like him in a place where crowds of people are literally a daily occurrence, and in fact the sine qua non of his career, so that with no end yet in sight for the covid-19 lockdown, there is nothing ahead but uncertainty.  Life is not horrible, mind you — but it makes me appreciate even more having a little corner away from it all, that is filled with spring flowers and books and miniature desks and yarns, solaces all.  The little prayer rug is progressing nicely, apart from the increasing obviousness that the last bit of 815 floss would not be nearly enough, not even to finish the center section let alone the more red-hungry borders.  I had resigned myself to working everything but the red, not wanting to put it away entirely until who-knows-when.  And then after a full month of her not working, Laura's boss phoned and asked, just as suddenly as the shifts had stopped, if Laura could work the next day.  A great many things have been postponed indefinitely for us now, re-prioritized so that necessities can be managed — Julia's 4-H lamb must be fed, Postcrossing can be put on hold, we can use bargain shampoo for heaven's sake, painting the house will just have to wait a bit longer — but since Laura's store carries DMC threads, I scrounged up the 53¢.  A small pleasure, to be sure, but a not insignificant one.

    0391